
Beginners Guide to Emulating Video Games on Steam Deck and Miyoo Mini+
Your Gateway to Retro Gaming
Retro gaming has never been more accessible these days. Whether you’re looking to revisit childhood classics or discover gaming history, modern handheld devices have made emulation remarkably straightforward. Especially in this era of devices and tools that are accessible. This comprehensive guide walks you through setting up two popular emulation platforms: the powerful Steam Deck running EmuDeck, and the pocket-friendly Miyoo Mini+ with Onion OS.
By the end of this guide, you’ll understand which device best suits your gaming needs and have everything configured to start playing immediately.
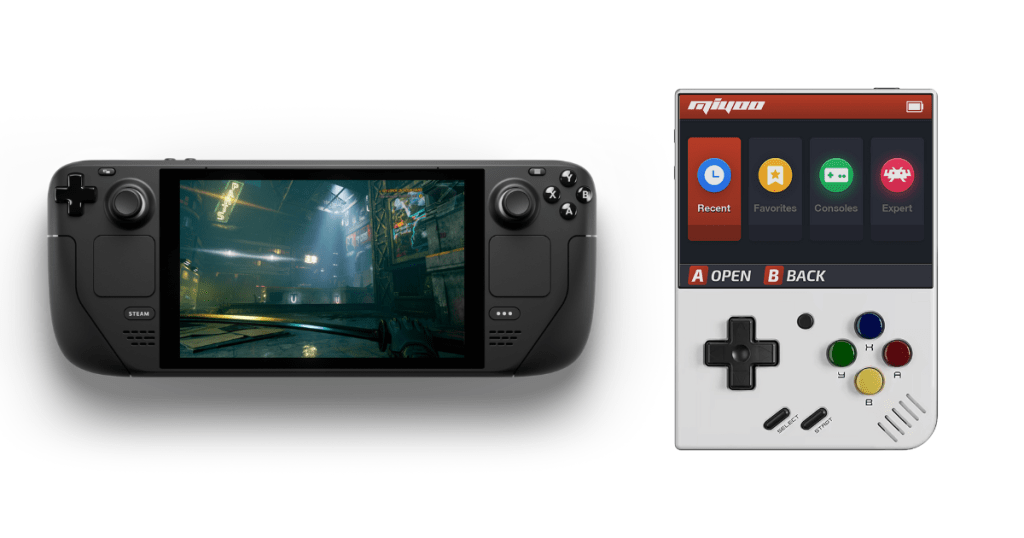
Understanding Your Options: Steam Deck vs. Miyoo Mini+
Before diving into setup, it’s important to understand what each device offers.
Steam Deck: The Premium Powerhouse
The Steam Deck is Valve’s portable gaming PC, and while it’s designed for modern PC gaming, it’s equally exceptional for emulation. With desktop-class hardware, the Steam Deck can emulate everything from 8-bit classics up through PlayStation 3, Wii U, and even Nintendo Switch games.
Key Advantages:
- Emulates virtually every console through PS3/Xbox 360 era
- Large, high-quality 7-inch display
- Powerful hardware handles demanding emulation
- Full Linux desktop environment for advanced customization
- Active development community
Miyoo Mini+: The Pocket Companion
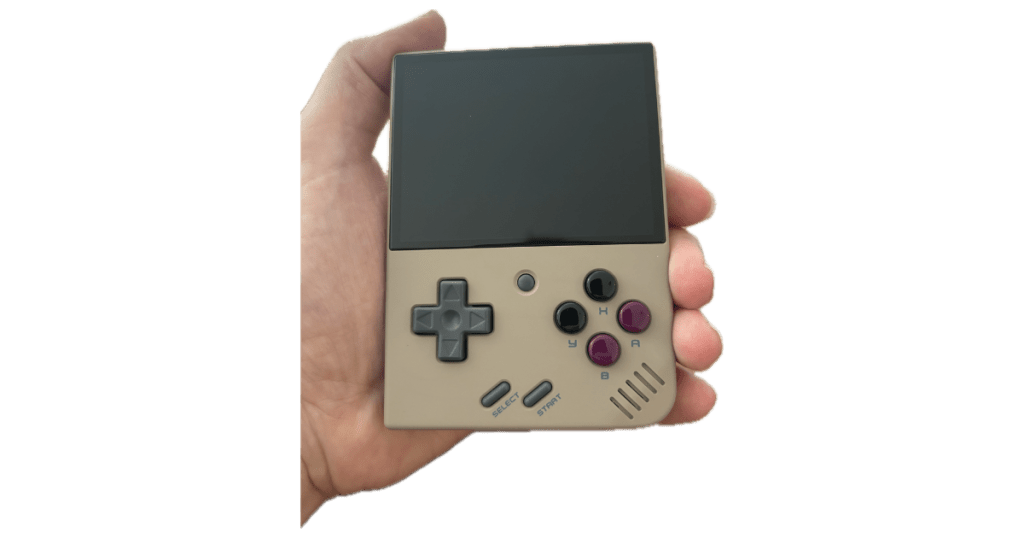
The Miyoo Mini+ is a budget-friendly, ultra-portable emulation handheld with a 3.5-inch display. It’s designed specifically for retro gaming and fits comfortably in your pocket.
Key Advantages:
- Extremely portable form factor
- Excellent battery life (6-8 hours)
- Perfect for 8-bit and 16-bit classics
- Budget-friendly price point
- Simple, focused gaming experience
Part 1: Setting Up Steam Deck with EmuDeck
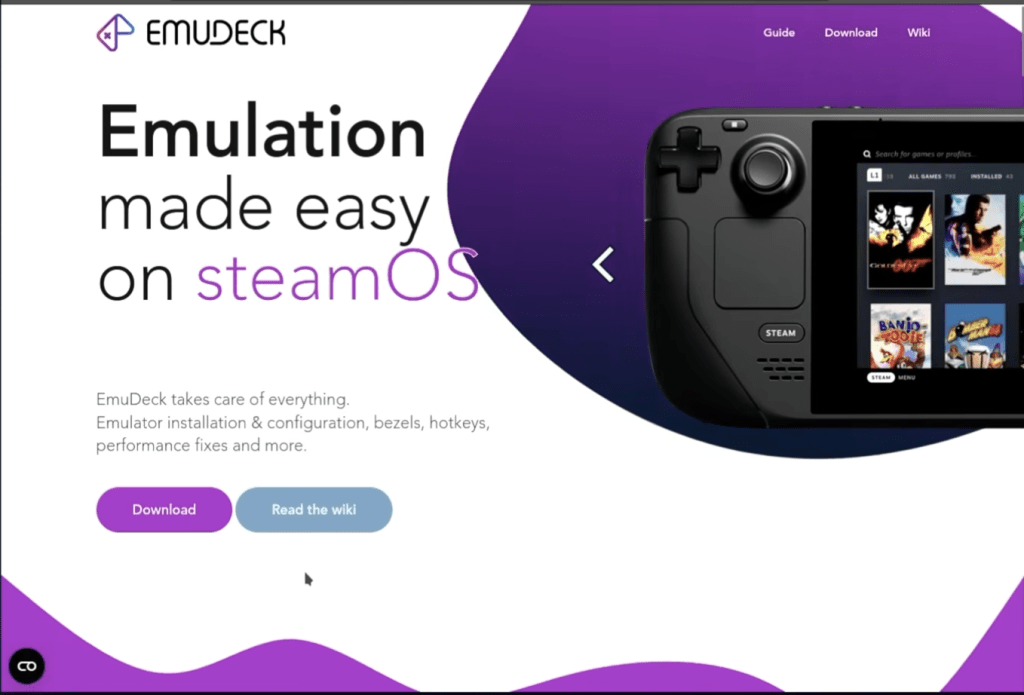
EmuDeck is an installation script that automates the entire emulation setup process on Steam Deck, installing emulators, configuring controllers, and organizing your game library.
Pro Tip: Bookmark the EmuDeck Cheat Sheet before you begin—it’s an invaluable resource for finding BIOS files, troubleshooting, and understanding which files go where.
What You’ll Need
- Steam Deck (any model)
- MicroSD card (256GB or larger recommended)
- PC or Mac for downloading ROM files
- USB-C hub or card reader (for transferring files)
- Internet connection
Step 1: Prepare Your MicroSD Card
Your microSD card will store both emulators and your game library. While you can install EmuDeck to internal storage, a dedicated card keeps things organized.
- Insert your microSD card into the Steam Deck
- Power on the device and wait for it to recognize the card
- The Steam Deck will automatically format the card if it’s new
- If prompted, select “Format for Steam Deck”
Pro Tip: Use a high-speed card (A2 rating) for better loading times and performance.
Step 2: Download EmuDeck
- Press the Steam button to open the Steam menu
- Navigate to Power → Switch to Desktop Mode
- Wait for the desktop environment to load
- Open the Discover application (the shopping bag icon)
- Search for “EmuDeck“
- Click Install and wait for the process to complete
Step 3: Run EmuDeck Installer
- Double-click the EmuDeck icon on your desktop
- Select your installation location:
- SD Card (recommended for most users)
- Internal Storage (if you have a large capacity model)
- Choose your setup mode:
- Easy Mode (recommended for beginners)
- Custom Mode (for advanced users who want specific emulators)
- Click Begin Installation
The installer will download and configure approximately 15-20 emulators. This process takes 20-30 minutes depending on your internet connection.
Step 4: Configure Controller Settings
EmuDeck automatically maps the Steam Deck’s controls to work with each emulator, but you can customize these.
- After installation, EmuDeck opens the EmuDeck Manager
- Select Controller Configurations
- Review the default mappings for each system
- Customize button layouts if desired (most users keep defaults)
Step 5: Add Your Games
Now comes the fun part—adding your game library.
- Connect your Steam Deck to your PC using a USB-C cable
- On Steam Deck, open Dolphin File Manager
- Navigate to your microSD card → Emulation → roms
- You’ll see folders for each gaming system (NES, SNES, PS1, etc.)
- From your PC, transfer ROM files to their respective folders
Finding ROM Files: The Internet Archive maintains collections of vintage software and games. You can also check the EmuDeck Cheat Sheet which provides helpful guidance on finding BIOS files and ROMs for various systems
Important File Organization:
- NES games → /roms/nes/
- SNES games → /roms/snes/
- PlayStation games → /roms/psx/
- PlayStation 2 games → /roms/ps2/
- GameCube games → /roms/gc/
- Wii games → /roms/wii/
Step 6: Update Your Game Library
- Open Steam ROM Manager from the EmuDeck desktop shortcuts
- Click Preview to scan all your ROM folders
- Review the detected games (Steam ROM Manager finds artwork automatically)
- Click Save to Steam to add games to your library
- Return to Gaming Mode by selecting the Return to Gaming Mode icon
All your emulated games now appear in your Steam library with proper artwork and can be launched just like native Steam games.
Steam Deck: What Can You Emulate?
The Steam Deck’s hardware is incredibly capable. Here’s what runs well:
Excellent Performance (Near 100% game compatibility):
- 8-bit/16-bit era: NES, SNES, Genesis, Game Boy, GBA
- 32-bit era: PlayStation 1, N64, Dreamcast
- 128-bit era: PlayStation 2, GameCube
- Portable: PSP, Nintendo DS, 3DS
Good Performance (Most games playable):
- Wii, Xbox, PlayStation 3
- Wii U (demanding titles may require tweaking)
- Nintendo Switch (compatible games run at playable framerates)
Limited/Experimental:
- Xbox 360 (limited game support)
- PlayStation Vita (emulation still in early stages)
Part 2: Setting Up Miyoo Mini+ with Onion OS
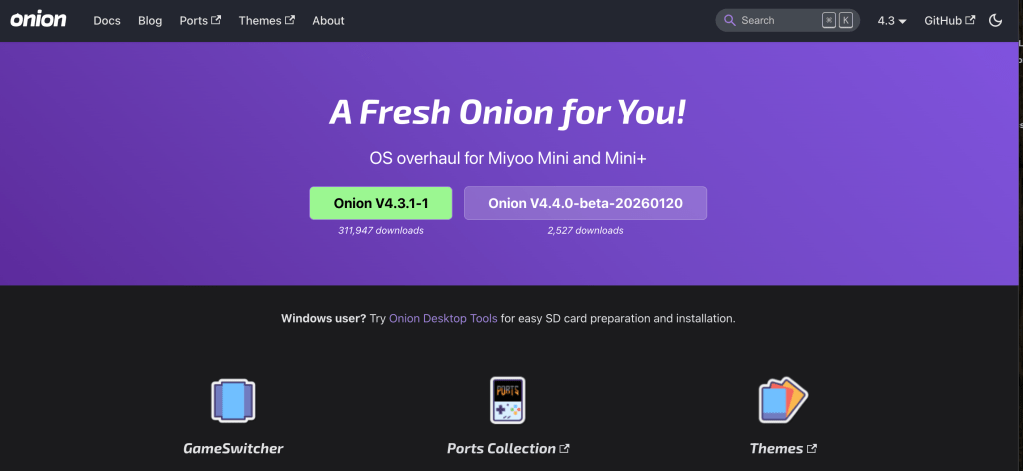
The Miyoo Mini+ comes with stock firmware, but Onion OS transforms it into a powerful emulation device with better performance, a cleaner interface, and enhanced features.
What You’ll Need
- Miyoo Mini+ device
- MicroSD card (64GB-128GB recommended)
- Card reader
- Computer for setup
- ROM files
Step 1: Backup Your Original Firmware (Optional but Recommended)
Before installing Onion OS, you may want to backup the stock firmware.
- Power off your Miyoo Mini+
- Remove the microSD card
- Insert the card into your computer
- Copy the entire contents to a backup folder on your computer
- Label this folder “Miyoo Stock Backup [date]”
Step 2: Download Onion OS
- Visit the official Onion OS GitHub releases page (search “Onion OS Miyoo” to find it)
- Download the latest stable release (look for “Onion-v[version].zip”)
- Download to an easily accessible folder on your computer
Pro Tip: Always use the stable releases unless you’re comfortable troubleshooting beta software.
Step 3: Format Your MicroSD Card
For best performance, use a fresh format.
- Insert your microSD card into your computer
- Use your computer’s disk formatting utility
- Format as FAT32 (required for Miyoo compatibility)
- Choose 32KB allocation size for optimal performance
Windows Users: Download “FAT32 Format” for cards larger than 32GB
Mac Users: Use Disk Utility, select MS-DOS (FAT32)
Step 4: Install Onion OS
- Extract the downloaded Onion OS .zip file
- Open the extracted folder
- You’ll see a folder structure including:
.tmp_updatefolderBIOSfolderRomsfolder- Additional system folders
- Copy all contents to the root of your microSD card
- Safely eject the card from your computer
Step 5: First Boot with Onion OS
- Insert the prepared microSD card into your Miyoo Mini+
- Power on the device
- Onion OS will automatically install on first boot (takes 1-2 minutes)
- The device will restart automatically
- You’ll see the new Onion OS interface
What you’ll notice immediately:
- Cleaner, more modern menu system
- Better performance and shorter load times
- Enhanced battery life indicators
- More customization options
Step 6: Add BIOS Files
Some emulators require system BIOS files to function properly, particularly PlayStation.
- Power off your Miyoo Mini+
- Remove the microSD card and insert into your computer
- Navigate to the BIOS folder on the card
- Add the required BIOS files:
- PlayStation:
scph1001.bin,scph5501.bin,scph7001.bin - Other systems as needed
- PlayStation:
- Safely eject and reinsert the card into your device
Where to Find BIOS Files: The Internet Archive hosts collections of system BIOS files. Search for “PlayStation BIOS” or the specific system you need. The EmuDeck Cheat Sheet also provides guidance on proper BIOS file names and locations, which applies to most emulation setups.
Legal Note: BIOS files should be dumped from systems you own. We cannot provide direct links to copyrighted BIOS files.
Step 7: Add Your Game Library
- With the card in your computer, open the Roms folder
- You’ll see subfolders for each system (FC for NES, SFC for SNES, etc.)
- Place ROM files in their corresponding folders:
Folder Reference:
- FC → Nintendo/Famicom (NES)
- SFC → Super Famicom (SNES)
- MD → Mega Drive (Genesis)
- GB → Game Boy
- GBC → Game Boy Color
- GBA → Game Boy Advance
- PS → PlayStation 1
- Create a boxart subfolder in each Rom folder for cover images
- Name boxart files identically to ROM files (different extension)
Finding ROM Files: The Internet Archive is a popular resource for locating vintage game files. Search for specific console ROM collections or individual game titles.
Step 8: Configure Settings
Power on your Miyoo Mini+ and explore the Onion OS settings:
- Press Menu from the main screen
- Navigate to Apps → Tweaks
- Key settings to configure:
- Display: Adjust brightness, pixel filtering
- Audio: Set volume limits, enable audio boost
- Controls: Configure button shortcuts
- Performance: Enable frame skip if needed for demanding games
Miyoo Mini+: What Can You Emulate?
The Miyoo Mini+ punches above its weight for retro systems but has clear limitations compared to Steam Deck.
Excellent Performance (Full speed, all games):
- 8-bit: NES/Famicom, Master System, Game Gear
- 16-bit: SNES, Genesis/Mega Drive, Game Boy, Game Boy Color
- Some arcade games (CPS1, CPS2, Neo Geo)
Good Performance (Most games playable):
- PlayStation 1 (lighter games run great; some demanding titles need tweaking)
- Game Boy Advance (nearly full speed on most titles)
- Older arcade systems
Not Compatible:
- Nintendo 64 (insufficient CPU power)
- Dreamcast, GameCube, Wii
- PlayStation 2, PSP
- Xbox (any generation)
- Nintendo DS (hardware can’t handle dual screens effectively)
- Modern systems
The Hardware Reality: The Miyoo Mini+ uses an ARM-based processor designed for efficiency, not raw power. It excels at what it was designed for—classic 8-bit and 16-bit gaming—but simply doesn’t have the horsepower for 3D-era consoles.
Device Limitations: What Each System Can and Cannot Do
Understanding the technical constraints of each device helps set appropriate expectations.
Steam Deck Limitations
While the Steam Deck is incredibly powerful, it’s not perfect:
Xbox Emulation Issues:
- Original Xbox emulation is still developing (only 30-40% compatibility)
- Xbox 360 emulation (Xenia) is experimental with very limited game support
- Requires significant configuration for compatible titles
- Performance varies wildly game-to-game
Other Constraints:
- Battery life suffers during intensive emulation (2-3 hours for PS3/Switch)
- Larger, less portable form factor
- Some Wii U titles require performance tweaking
- PS3 emulation works but some games need specific settings
Best Use Case: Everything from NES through PlayStation 2, GameCube, and selected PS3/Wii U/Switch titles.
Miyoo Mini+ Limitations
The Miyoo Mini+’s limitations are more pronounced due to its lower-powered hardware:
Cannot Emulate:
- N64: The processor simply isn’t powerful enough for 3D polygon rendering at playable speeds
- Dreamcast/GameCube/Wii: Far beyond the hardware capabilities
- PlayStation 2: Would require 10x more processing power
- PSP: Needs significantly more RAM and GPU power
- Xbox (any generation): Not compatible with ARM architecture emulation
- Nintendo DS: Dual screens and touchscreen make it impractical
- 3DS, Switch, Wii U: Modern systems requiring desktop-class hardware
PlayStation 1 Caveats:
- Works well for 2D games and simpler 3D titles
- Demanding 3D games may have slowdown
- May require frameskip for certain titles
- Not all games are playable at full speed
Best Use Case: Perfect for pure retro gaming—NES, SNES, Genesis, Game Boy family. Think of it as a device for games released before 1997.
[IMAGE: Side-by-side showing compatible vs incompatible systems on Miyoo Mini+]
Alt Text: Visual comparison showing retro gaming systems compatible with Miyoo Mini Plus versus modern systems that cannot be emulated
Making Your Choice: Which Device Is Right for You?
Choose Steam Deck If:
- You want to play PS2, GameCube, Wii, and newer systems
- You’re comfortable with a larger device
- You want a single device for both modern PC games and emulation
- Budget isn’t a primary concern ($400+)
- You want the best possible emulation experience
Choose Miyoo Mini+ If:
- Your focus is purely 8-bit and 16-bit classics
- Portability is essential (pocket-sized)
- You want exceptional battery life
- You’re on a budget ($60-80)
- You prefer a device dedicated to retro gaming
- You appreciate the nostalgia of a smaller handheld
The Best of Both Worlds
Many enthusiasts own both devices because they serve different purposes:
- Steam Deck at home for intensive gaming sessions with newer systems
- Miyoo Mini+ in your pocket for quick retro gaming anywhere
Legal Considerations and ROM Sources
It’s important to address the legal landscape of game emulation.
The Legal Framework
- Emulators themselves are legal in most jurisdictions
- Creating backups of games you own is generally protected under fair use
- Downloading ROMs you don’t own is copyright infringement
- Sharing or distributing ROMs is illegal
Legitimate ROM Sources
- Dump your own cartridges using devices like Retrode or GB Operator
- Purchase from legitimate sources (some publishers sell old games as ROM files)
- Homebrew and public domain games are freely available
- The Internet Archive maintains digital preservation archives of vintage software, though the legal status of downloading copyrighted content varies by jurisdiction
Finding What You Need
The EmuDeck Cheat Sheet is your best resource for understanding file requirements across different emulators. It provides:
- Required BIOS file names (exact spelling matters!)
- File locations for each system
- MD5 checksums to verify file integrity
- Troubleshooting tips for common issues
Best Practices
- Only emulate games you physically own
- Support re-releases and official collections when available
- Respect intellectual property rights
Troubleshooting Common Issues
Steam Deck / EmuDeck Issues
Problem: Games not appearing in Steam library
Solution: Run Steam ROM Manager again and ensure ROMs are in correct folders
Problem: Controller not working in specific emulator
Solution: Open EmuDeck Manager → Controller Configurations → Reset that emulator’s config
Problem: Poor performance in PS2/PS3 games
Solution: Lower resolution in emulator settings, enable frameskip, or check ProtonDB for game-specific settings
Problem: Audio crackling or stuttering
Solution: Update emulators through EmuDeck Manager, adjust audio latency in emulator settings
Problem: Missing BIOS files causing games not to load
Solution: Check the EmuDeck Cheat Sheet for exact BIOS file names and MD5 checksums, then place files in the correct BIOS directory
Miyoo Mini+ / Onion OS Issues
Problem: Black screen on boot
Solution: Reformat card as FAT32, reinstall Onion OS, ensure all files copied correctly
Problem: PlayStation games won’t load
Solution: Verify BIOS files are in BIOS folder with correct names (case-sensitive)
Problem: Games running slowly
Solution: Enable frameskip in RetroArch menu, lower resolution if available, ensure ROM isn’t corrupt
Problem: No boxart showing
Solution: Ensure images are in boxart subfolder within each ROM directory, named identically to ROM file
Conclusion: Start Your Retro Gaming Journey
Both the Steam Deck with EmuDeck and the Miyoo Mini+ with Onion OS offer exceptional emulation experiences tailored to different needs. The Steam Deck provides unmatched power and versatility, handling everything from Atari 2600 to PlayStation 3. The Miyoo Mini+ delivers the perfect pocket-sized experience for classic 8-bit and 16-bit gaming.
Whichever device you choose, you now have the knowledge to set up your system, understand its capabilities and limitations, and start building your retro gaming library. The golden age of gaming is now truly portable—and the setup is easier than ever.
Ready to dive deeper? Share your emulation experiences, favorite games, and setup tips in the comments below. Happy gaming!
Quick Reference: System Compatibility at a Glance
| Console | Steam Deck | Miyoo Mini+ |
|---|---|---|
| NES/Famicom | ✅ Excellent | ✅ Excellent |
| SNES/Super Famicom | ✅ Excellent | ✅ Excellent |
| Genesis/Mega Drive | ✅ Excellent | ✅ Excellent |
| Game Boy/Color | ✅ Excellent | ✅ Excellent |
| Game Boy Advance | ✅ Excellent | ✅ Good |
| PlayStation 1 | ✅ Excellent | ⚠️ Good (mixed) |
| Nintendo 64 | ✅ Excellent | ❌ Not Compatible |
| Dreamcast | ✅ Excellent | ❌ Not Compatible |
| PlayStation 2 | ✅ Excellent | ❌ Not Compatible |
| GameCube | ✅ Excellent | ❌ Not Compatible |
| PSP | ✅ Excellent | ❌ Not Compatible |
| Nintendo DS | ✅ Excellent | ❌ Not Compatible |
| Wii | ✅ Good | ❌ Not Compatible |
| PlayStation 3 | ⚠️ Good (mixed) | ❌ Not Compatible |
| Nintendo 3DS | ✅ Good | ❌ Not Compatible |
| Wii U | ⚠️ Good (mixed) | ❌ Not Compatible |
| Switch | ⚠️ Experimental | ❌ Not Compatible |
| Xbox (Original) | ⚠️ Limited | ❌ Not Compatible |
| Xbox 360 | ⚠️ Very Limited | ❌ Not Compatible |
Legend:
✅ Excellent = Full speed, all or nearly all games playable
⚠️ Good/Mixed = Most games playable, may require tweaking
❌ Not Compatible = Hardware cannot run these systems