


How to Mix Drums and Voice in Logic Pro X (Plugins & Tips)
If you’ve heard my drum covers or remote session work, you know that Logic Pro X is the backbone of my audio workflow, and its the essential part of ‘my sound’. Whether I’m tracking new drum covers, and simply testing specific plugins to enhance my kit, or polishing up a vocal take for an audition, the right mix makes or breaks your final sound in the end.
In this guide, I’ll show you how to edit and mix drums and voice in Logic Pro X, the exact plugins I use from my experience over the years, and where you can see (and hear) real examples on Our Work / Music page.
Why Logic Pro X?
So first off, Logic Pro X has been my go-to DAW for years because it’s powerful, intuitive, and comes loaded with high-quality stock plugins that are free. You don’t need fancy third-party suites to get a tight drum sound or clean, present vocals — you just need to know what tools to use, and how to configure and craft them towards the sound you are leaning towards.
Go-To Plugins for Drums and Voice
Drums
Voice
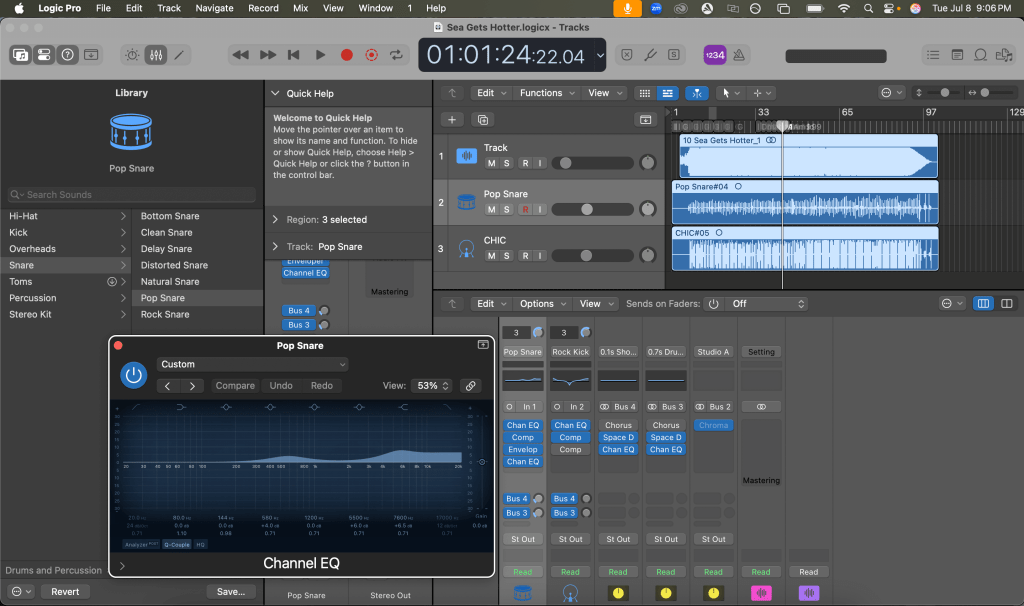
Pro Tip: Group your vocals and process the bus for consistent reverb and subtle compression glue.
Quick Step-by-Step Mixing Guide
Mixing drums and vocals is all about giving each element its own space. This process isn’t about chasing perfection — it’s about making your drums punchy, your vocals clear, and having fun with it. These steps are exactly how I take raw stems and shape them into a polished mix for my clients and my own releases.
Step 1: Import and Organize Tracks
Start by importing your drum stems and vocal takes. Color code them in Logic’s mixer for easy navigation.
Step 2: Clean Up Edits
Use the scissors and fade tools to remove silences, bleed, or background noise. Tight edits make your plugins work better.
Step 3: Apply EQ
Drums: Cut mud at 200–400Hz, boost snap around 5–7kHz. Voice: Remove low rumble around 80Hz, add air above 8kHz.
Step 4: Compress for Balance
Drums: Use the Vintage VCA for punch. Voice: Vintage Opto keeps vocals warm and even.
Step 5: Add Gate or DeEsser
Drums: Noise Gate controls mic bleed. Voice: DeEsser reduces harsh S sounds.
Step 6: Add Reverb (optional)
Use Space Designer for a natural room vibe. Drums love a short plate; vocals pop with a subtle hall.
Step 7: Final Dynamics
Drums: Multipressor to tame any harsh spots. Voice: Limiter on the vocal bus to catch peaks.
Pro Tip: Save your channel strip settings for next time. This will save you so much time as you start to work on other projects, and or tracks.
Editing & Mixing Tips
Before you hit export, these small steps make a huge difference in the process, and save time as well. Good editing and cleanup are just as important as your plugin chain while you’re mixing tracks. Here’s how I tighten up raw takes, keep my drums clean, and make vocals sit well in the mix — no guesswork needed.
- Always edit out silences to remove bleed or ambient noise.
- Use fades on drum clips to prevent clicks.
- Bounce stems to check your mix on different speakers (car test!).
- Save channel strip presets — huge time saver for future covers or client sessions.
Need an example? Check out Our Work / Music page.
Final Thoughts
Mixing drums and voice doesn’t need to be complicated — Logic Pro X gives you all the tools to build a clear, punchy mix with just stock plugins. The secret is knowing when to cut, when to compress, and when to keep it natural in the process.
If you want to hear how this works in action, head to the Our Work / Music page — I keep it updated with new tracks, drum covers, and remote sessions. Need help mixing your own? Contact me — let’s get it sounding right!